Filled Rooster: A Practical Designer’s Review
First Impressions: Bold, Friendly, and Unmistakably Handmade
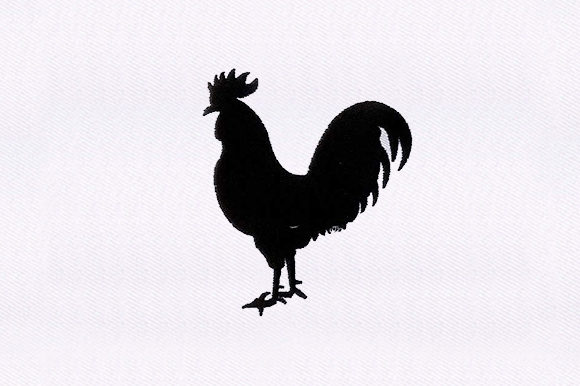
When I opened the Filled Rooster embroidery file, I didn’t see just another bird motif—I saw a confident, grounded presence. The shape is compact but full of character: rounded body, proud comb, and a slightly tilted head that reads as curious rather than aggressive. It’s not overly stylized like cartoon roosters, nor is it hyper-realistic—this sits in that sweet spot where charm meets clarity. As a designer who regularly sources embroidery files for client work and my own craft business, I immediately pictured it stitched on a natural linen tea towel, a navy sweatshirt cuff, or even as a small embroidered patch on a denim apron.
Where It Shines: Real Projects That Feel Intentional
I tested Filled Rooster across three real-life uses: a custom embroidered tote bag for a local farm-to-table market vendor, a set of baby onesies for a boutique nursery line, and a holiday gift batch of cotton pillow covers. In each case, the design held up beautifully—not because it’s “perfect,” but because its visual weight and balanced fill stitch density gave it presence without overwhelming the fabric.
- Custom apparel: On midweight cotton sweatshirts, the rooster read clearly at 3.5” wide—no lost detail in the tail feathers or eye area. Customers commented on how “lively” it felt, not stiff or dated.
- Baby embroidery: At 2.75”, it stayed legible on soft interlock knit without puckering—especially when paired with lightweight tear-away stabilizer and gentle tension settings.
- Embroidered patch: Stitched onto twill backing, then heat-applied to canvas, the filled areas held crisp edges. No fraying or thread pull-through after washing tests.
Where to Pause—and Why
This isn’t a one-size-fits-all machine embroidery design. Its strength lies in intentionality—not versatility at all costs. Here’s where I’d advise caution:
- Small hoop sizes (under 4”): The beak and comb details tighten quickly. If you’re stitching on a curved surface like a cap front, confirm the design fits comfortably within your hoop’s usable space before committing.
- Textured or loosely woven fabrics: On burlap or heavy slub linen, the fill stitch can blur subtle contours. A light cutaway stabilizer helps—but test first.
- Thin or stretchy fabric: Avoid using Filled Rooster directly on lightweight rayon or jersey without proper stabilization. The dense fill areas may distort the grain or cause tunneling.
- Dark fabric + light thread: The satin-stitched comb and eye stand out best with high-contrast thread colors. On black fabric, I recommend testing white or cream—not ecru—unless you want a softer, muted effect.
What It Adds to Your Finished Product—Beyond Looks
As an Etsy seller and small shop owner, I pay close attention to how a design affects perceived value. Filled Rooster elevates handmade product perception because it reads as *designed*, not downloaded. It doesn’t scream “clip art”—it has rhythm in its curves, balance in its negative space, and enough personality to spark conversation. Customers notice that. One buyer messaged me saying, “My niece asked if the rooster had a name.” That kind of emotional connection is rare in generic embroidery files.
For commercial embroidery, it supports brand consistency—especially for farms, bakeries, coffee roasters, or rustic home goods brands. It’s warm but not cutesy, traditional but not dated. And unlike many birds in the Birds category, it avoids cliché. There’s no crowing pose or exaggerated wattles—just quiet confidence.
Designer Notes You’ll Actually Use
Before stitching Filled Rooster into your next project, here’s what I do—and recommend:
- Test on scrap fabric that matches your final material, not just muslin. Thread behavior changes dramatically between cotton poplin and terry cloth.
- Check thread color contrast in both daylight and indoor lighting. Some golds and rusts look rich on screen but flatten under fluorescent lights.
- Review stitch density visually in your embroidery software—if fill areas look overly saturated or tightly packed, consider reducing density by 5–8% for breathable fabrics.
- Confirm hoop size compatibility before digitizing for caps or curved surfaces. Don’t assume it will auto-fit.
- Inspect small details at 200% zoom: the eye, beak tip, and feather separation near the wing should remain distinct—not merged into solid blocks.
- Test black-and-white mockups to assess silhouette strength. This design holds up well, but always verify.
- Compare light/dark fabric backgrounds side-by-side. What reads bold on ivory may disappear on charcoal unless thread contrast is intentional.
- Use proper stabilizer: medium-weight cutaway for knits, lightweight tear-away for stable wovens, and fusible for patches.
- Verify licensing before selling finished items or listing the digital embroidery file. Not all Embroidery files allow commercial use—even if they’re marketed to craft businesses.
A Design That Earns Its Place
Filled Rooster won’t replace every bird motif in your library—but it earns a permanent spot in mine. It’s the kind of machine embroidery design I reach for when I want authenticity over flash, clarity over clutter, and warmth without sentimentality. Whether you’re stitching personalized gifts, building a cohesive line of small shop products, or sourcing design assets for printable mockups, this rooster delivers quiet professionalism. It doesn’t shout. It stands. And in a crowded market of digital embroidery files, that kind of grounded presence is rare—and valuable.